

how to draw a wave easy
This surf art tutorial is brought to you by Bob Penuelas, an illustrator famous for his surfing comic strip, Wilbur Kookmeyer. Created past Bob Penuelas in 1986, Wilbur Kookmeyer was a regular two-folio feature in Surfer Mag, gaining a cult following in the surfing community.
You lot probably spent a lot of time in high schoolhouse, or at work, daydreaming and doodling a thousand perfect cartoon waves in your notebook. This tutorial will help you lot change your throw-away wave doodles into works of art you'll want to keep forever.
Remember, there are many ways to draw a moving ridge, this tutorial but covers a few techniques, but hopefully, with these simple pointers, you lot'll discover many more ways to draw a wave. Take fun!
P.S. If you're looking for inspiration, check out these surfing illustrations.
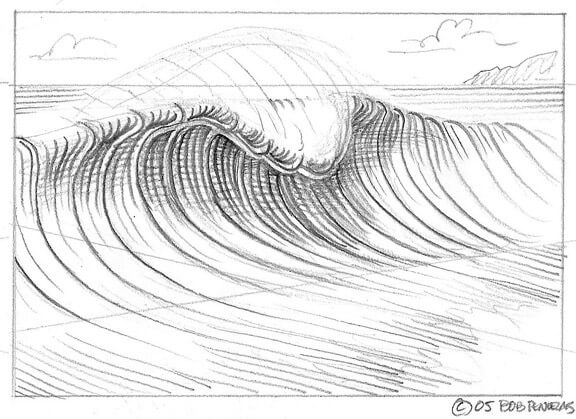
Cartoon a basic moving ridge
The post-obit illustrations and captions past Bob Penuelas have you through the basic steps of cartoon a wave.

Pace 1
Sketch in the bones shape of the scroll, spray, foam and base of operations of the moving ridge.
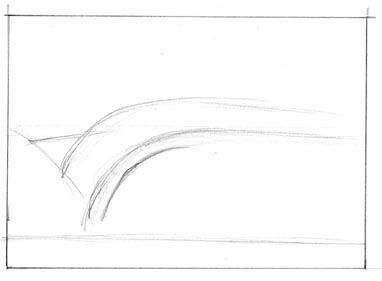
Step 2
Add an extra line running parallel and below the curl line to define the thickness of the lip.
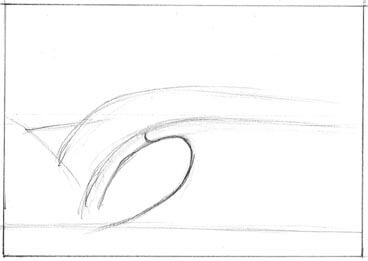
Step three
Add together a flow line starting at the lip and curve it around to suggest roundness of the liquid lip. Proceed that same menses line around with a half oval down to the base of operations of the wave to evidence the concave bend of the wave face.
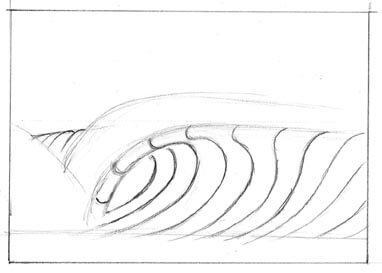
Step four
Add the rest of the menstruum lines. Gradually make each catamenia line less steep as yous motility away from the coil, to prove the tapered shoulder. Go on the flow lines into the tube to bear witness hollowness.
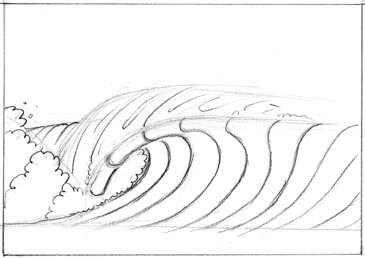
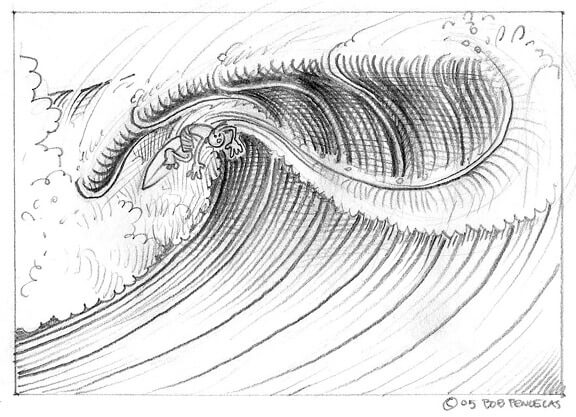
Step 5
Add simplified spray with thin wispy lines. Add together the cream explosion with a serial of explosion lines getting bigger as they moving away. Perchance add together a foam brawl in the tube. Round off the foam at the base of the moving ridge so it won't look flat.

Step vi
Add together shading on the wave face with smaller contour lines. Gradually make the lines darker equally you get further into the tube. Use crosshatching to add together more than depth. Lightly shade foam and base of operations of the wave. Maybe shade the sky a little, likewise.
Tips
- Don't get caught up trying to draw every foam bubble, you'll go basics.
- Using a sharp eraser, keep a defined white line under the lip and so it looks split up from the moving ridge face.
- Add white highlights on the lip with your eraser to give it sparkle.
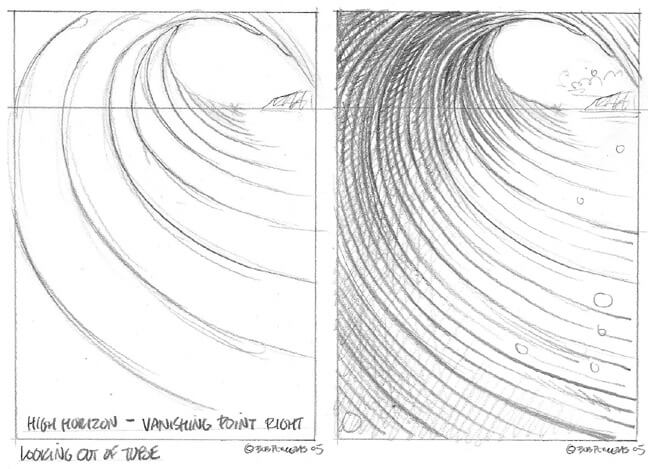
The importance of perspective
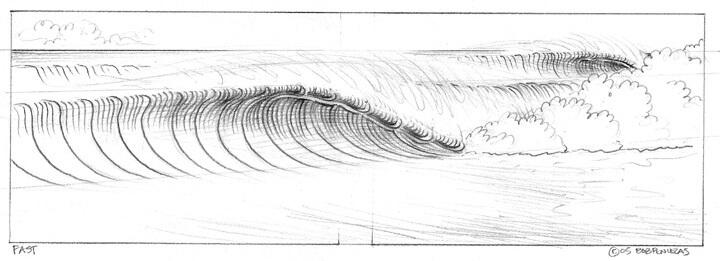
Drawing a basic wave can exist fun, but after a while it can become boring if yous are only following the same formula over and over again. The primal to breaking out of this potential heat is achieved by drawing waves from dissimilar angles. There is but one style to successfully create a variety of angles and that is past using the basic principles of perspective. The two basic ingredients in perspective are the horizon line (your eye level) and the imaginary vanishing points. By but changing the position of these ingredients in your paradigm you'll be amazed at the variety of waves yous can create. See the ii sketches beneath:
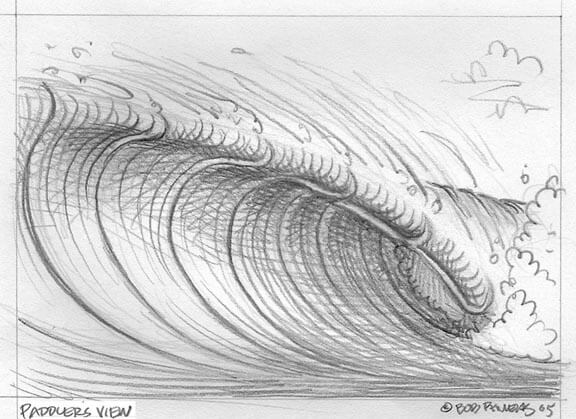
A paddler's view
Low horizon. Vanishing betoken off left:

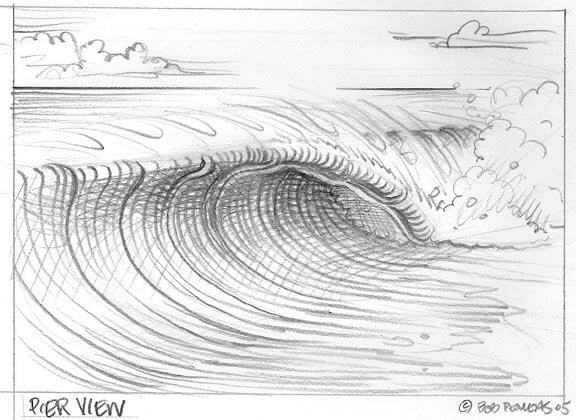
A pier view
High horizon. Vanishing betoken left:

A view into the tube
Additional variations tin be achieved by moving the horizon line high or low and by moving the vanishing point right or left. Requite it a try:

A view out of the tube
A high horizon line and i vanishing signal on the left makes information technology look as if your face is against the face up of the wave and you're racing for daylight (run into beginning 2 images below). And if y'all movement the vanishing point to the correct then more of the face becomes visible (come across last two images below):

A view from a pier
A loftier horizon line with 2 vanishing points off to the right and left makes it appears as though yous're viewing the wave from a pier, looking downwards on the moving ridge:
A paddler'south center view
A paddler'due south eye view tin be achieved by placing the horizon line extremely low. Both vanishing points are located outside of the image border, i to the left and ane to the right:
A bird's center view
A bird's center view tin exist accomplished by moving the horizon line up and completely off the epitome. The 2 vanishing points are positioned way out to the right and left:
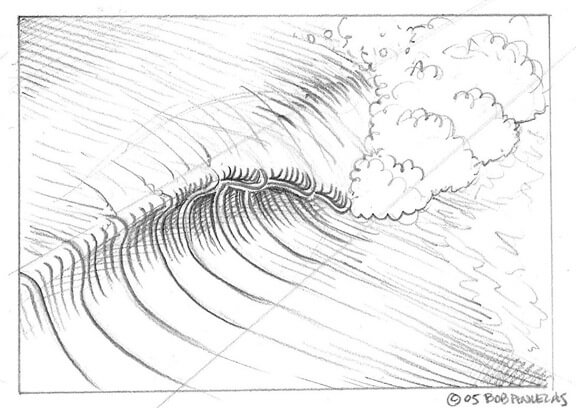
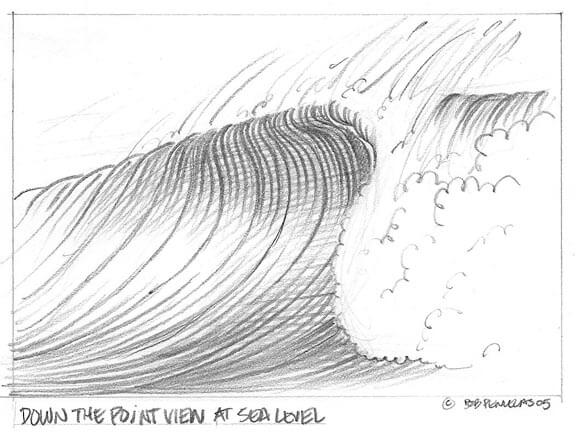
A downwardly the point view
A view looking downwardly the point tin can likewise be achieved by moving these ingredients effectually:
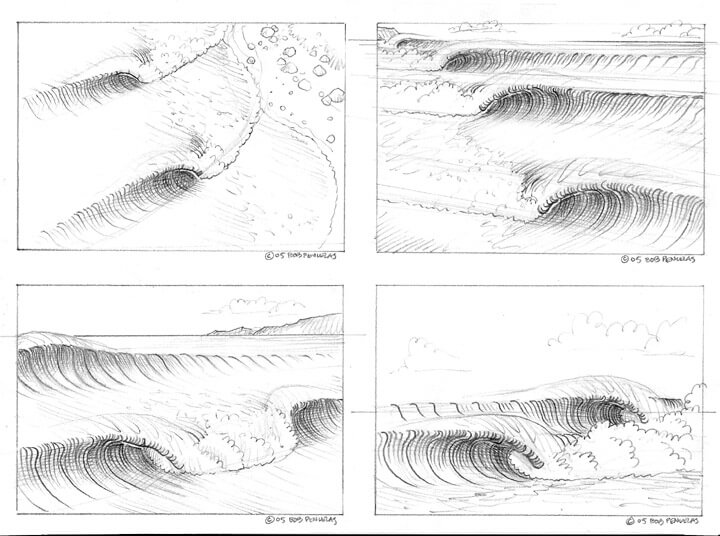
Various scenes
With perspective, y'all can at present create line-up scenes, with multiple waves. Information technology could be a reef pass, a beach break or a signal interruption Add land in the background or in the foreground to give the scene some depth. See the four sketches below:
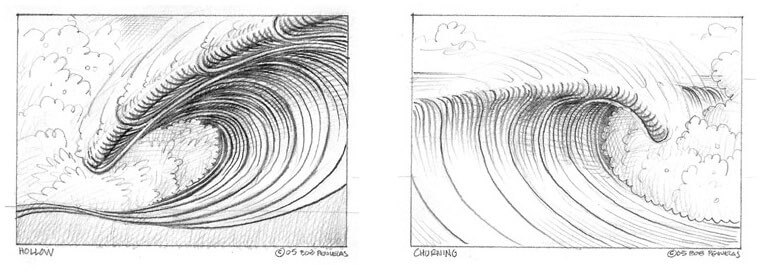
Unlike types of waves
Don't forget about hollow waves, freight-trains, slow-churning or paper-thin waves. The possibilities are endless:
Peaks
Avert cartoon a height by merely attaching two mirror prototype waves together. The right and the left are the aforementioned yet they are fatigued differently.
Add surfers
Don't forget to add surfers to your waves, whether yous draw them regular or goofy pes, backside or frontside, you before long realize that there are endless combinations. Come across the three sketches below:
A surfer doing a cutback on a wave:
A surfer riding a big wave:
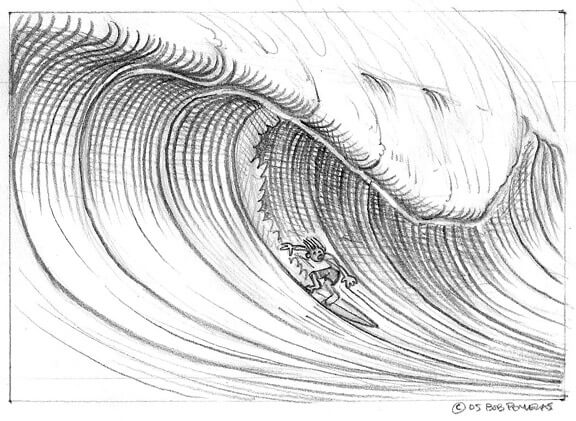
A side profile drawing of a surfer riding a barrelling wave:
If y'all enjoyed this tutorial, delight share it with your friends and followers. And share your drawings with usa on Instagram or Twitter.
Curated by Bob Penuelas on Jun 24, 2008

Source: https://clubofthewaves.com/feature/how-to-draw-a-wave/
Posted by: woodsgreaughts.blogspot.com
0 Response to "how to draw a wave easy"
Post a Comment